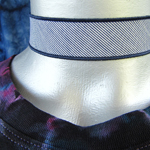
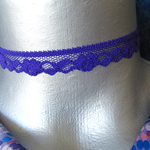
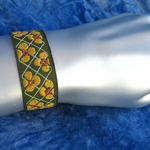
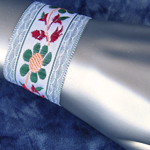
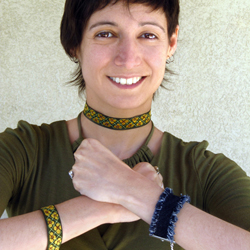
 Ribbon chokers and bracelets are sweet, simple and most importantly fun to make.
Hello! My name is Rina Slayter and I own an online shop called Twilight's Fancy. I love to make ribbon jewelry: namely ribbon choker necklaces and ribbon bracelets. I've put together this tutorial to help you learn how to make ribbon choker necklaces and bracelets. They both use the same techniques.
Before I get into the act of making them, let's first go over the tools and supplies you'll need.
If you need a closer look, click on the images. Most open up larger. Some lead to further information.
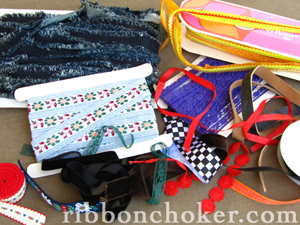 For me, it all starts with the ribbon, but there's really no limit. A strip of fabric, lace, ribbon, vinyl, leather, anything long and flat will do.
For myself, I like to recycle ribbon into chokers or bracelets. I'll use the ribbon scraps that come on gift boxes or even a good section of an old leather belt. Fabric remnants work great as long as the edges are either meant to be frayed, but they can be sewn or otherwise treated to keep them from fraying. Sometimes trims need to be sewn to other ribbon or they'll pull apart once clamped.
Next you'll need certain supplies.
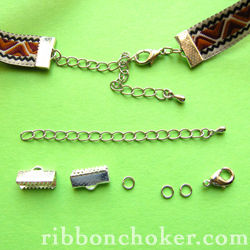
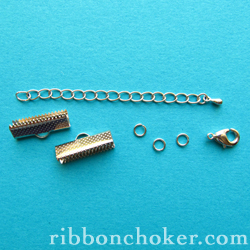
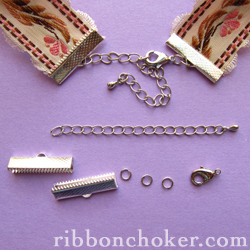
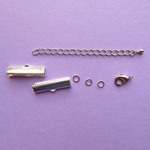
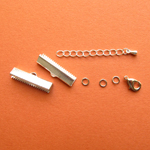
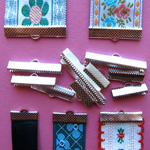
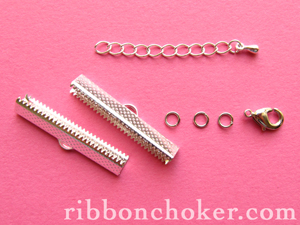 Ribbon clamps are what hold the ribbon in place. They come in many different sizes. I have a selection of ribbon clamps available in my shop in case you need some. I also carry complete ribbon jewelry finding hardware kits which include everything but the ribbon.
You'll need a clasp. I like to use lobster clasps because they're so easy to hook.
To make your choker adjustable, a length of chain is quite helpful. Otherwise, just a tab or jump ring will do. I use 3 jump rings to hold all the jewelry findings together.
There are also a few tools you'll need.
A ruler or measuring tape is optional. If someone tells you the size of her neck, you'll need a measuring tape or ruler to measure out the right length of ribbon. Otherwise, if it's yourself, you can just run the ribbon around your neck and be sure to cut about an inch shorter than that. It really only needs to be 3/4 of an inch shorter to accommodate all the hardware, but I go a full inch just to be on the safe side. Since I use 3 inch extension chains, sometimes I go as much as an inch and a half shorter so that I can wear the choker high or low around my neck.
Necks seem to vary in size. Even after all the chokers I've made, I can't seem to figure out which is the most common neck size. I'm on the smaller end around 11" and my best friend is on the larger end around 15 1/2".
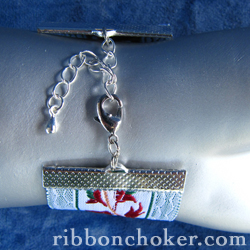 When I make ribbon bracelets, I use a shorter extension chain so that it doesn't dangle down as far and get in the way of my day to day activities. I subtract about an inch from the measurement in order to leave room for the hardware. Ribbon bracelets should fit snugly, but they don't have to. Chokers are more of an exact science, but bracelets can have some play. My wrist is on the small end around 5" while my best friend is around 7 1/2"-8". Bigger can be better and the hardware will usually weigh it down so that only the ribbon is on top, not the clasp.
Ribbon in general can be any width you'd like. It comes down to personal preference. I tend to favor 5/8" (16mm) around my neck and an inch or more around my wrist. But sometimes I mix widths on my wrist for a layered look or wear a very wide choker for dramatic effect.
As for tools, sharp fabric scissors work the best on ribbon. But you probably already knew that... Just be sure to cut the ribbon at a straight perpendicular angle so that the clamp will easily sit against it without being crooked.
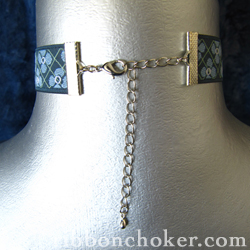 A lighter is handy for searing the edges of synthetics like nylon or polyester. Just wave the flame near the edge of the ribbon and the edge will melt and seal itself to help stop it from fraying.
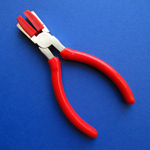
Pliers can get a little tricky. I use two pairs of chain nose pliers when opening and closing the jump rings. Those are some of the easiest pliers to find. The others I use have nylon jaws so as not to scratch the ribbon clamps. I have some nylon jaw pliers available in my shop, but I run out of stock from time to time so get 'em while I've got 'em.
Okay, now you should be ready to put together a ribbon choker or ribbon bracelet.
Get ribbon or lace or whatever flat pretty stuff you'd like to use. Put it around your neck and subtract about an inch. Cut it straight. If it's synthetic, run the end near a candle or lighter flame to sear the edge. If it's not synthetic, well, I haven't come up with a method as good as searing, but natural fibers don't melt, so I just make sure to compress the clamps really tightly to hold the fibers together.
Get ribbon clamps that match the width of your ribbon. If the ribbon is too wide, you can fold it to fit. Personally, I think it looks the nicest when the clamp matches. It just looks cleaner. I offer a bunch of different sizes of ribbon clamps in my shop.
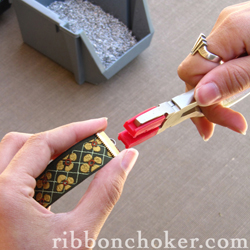
Sometimes attaching the ribbon clamps is a little tricky. You have to line up the ribbon in the clamp and keep it straight while you close the pliers, crushing the clamp closed onto the ribbon.
Being right handed, I have the pliers in my right hand, place the clamp in the jaws, add the ribbon with my left hand and sort of hold it all steady while I close the clamp. Sometimes I get my fingers caught in the clamps. It's only a momentary ouch and has yet to leave a mark, but I figured I might pass along the friendly warning. I obviously try not to crimp my fingers, but sometimes it's unavoidable.
Working with wide ribbon clamps is a little different.
When I'm closing a wide clamp, I start in the middle and work outward. First, I close it about half way--it's not yet gripping the ribbon.
Then I close it all the way. That helps keep away kinks in the metal.
Once it's closed, I place it flat in my pliers, press, flip it over and press again to make sure it's good and tight and the ribbon's not going to slide out.
Do that on both ends of the ribbon.
When assembling the hardware, I like to start by opening a jump ring, putting the clasp on it, closing it back up and then setting it down. I do this so that the clasp will be aligned properly when the whole choker or bracelet is fully assembled.
From there, I open another jump ring, place the extension chain and one end of the ribbon in it.
Okay, open the other jump ring. Thread it through the loop on the other ribbon clamp. When you put the clasp on, the lever should be facing the front of the ribbon or the hook should be facing the back of the ribbon. If you're using double-sided ribbon or lace, it doesn't matter which side the hook or lever faces. Close the jump ring.
Voila! Your new ribbon choker necklace or bracelet is ready to wear plain and simple.


If your ribbon needs to hang in a certain direction, be aware which side needs the clasp and which side needs the chain. I like to hold it up in front of me. If you're using a simple satin or non-scalloped lace, it doesn't matter which side is which. If you're using a scalloped lace (only scalloped on one side) or a ribbon with a pattern that has a top and bottom such as words embroidered or printed on it and you're right handed like I am, the scallop or bottom of the pattern should be on the lower edge, front side up, chain goes on the right hand side, clasp on the left so that when you put the choker on, the clasp is in your right hand. Lefties should put the chain on the left and the clasp on the right.
For a bracelet, it doesn't matter as much, but I do tend to do it the same way as a right handed choker and I use a shorter chain.
You can add beads, pin on a brooch, clip on a bow...the sky's the limit.
I have a selection of supplies and findings for making ribbon choker necklaces and bracelets in my ArtFire shop: Findings, pliers and hardware kits for ribbon choker necklaces and ribbon bracelets
I hope you found this tutorial useful. Please contact me with tips, tricks, comments or questions. I'd love to hear from you.
NOW AVAILABLE IN MY ARTFIRE SHOP...
★★★★★ Use coupon code RIBBONCHOKER-4 during checkout and receive a free hardware kit with any purchase. Please specify which size you need in the Note to Seller box or I will choose one at random. ★★★★★


